Wednesday, April 30, 2014

Candy Dish Pillows


It's so fun to finally be able to share my Jaybird Quilts Sew Along project with you today!

I used the pattern "Candy Dish," along with the Hex N More ruler.  I don't own many "specialty" rulers, so it was really a treat to be able to try this one out.  I loved it!   The pattern also offers the option to make your own templates, but "wow!" did this ruler make it easy.  Now I'm having fun looking at all of the other Jaybird Quilts patterns that use this ruler -- lots of fun options!

The pattern uses 4 1/2" hexagons and 2 1/2" triangles -- and the cutting is so easy with this cool ruler.  This is a fantastic pattern for using up little scraps of fabric.  I have been saving even my tiniest scraps of AMH Good Folks, and was able to use quite a few in this project!
Each pillow top came together in a few hours.  For whatever reason, I found matching up the triangle points easier on the pillow with the solid triangles rather than the solid hexagons.  I ended up pinning along my seam line for the trickier pillow top, and then slowly removed the pin as I sewed along this line.
For the quilting I copied the pattern pillows -- the straight line quilting gives it such texture!  I drew lines with my water soluble marker down the middle of each hexagon, so that I'd have a mark to know where to switch direction for the zig zags.


These pillows finish at 16 inches square.
I finished mine with invisible zippers, and put them in the corner of my living room where I can see them every day!


Friday, April 25, 2014

Weekend Plans

Do you have any quilting plans this weekend?
Here's what I'll be working on:
I can't wait to have this one finished!
The backing is a super soft minky swirl -- perfect for snuggling!

Wednesday, April 23, 2014

Works in Progress (4.23.14)

My most frustrating work in progress this week is my sewing room! 
Ice dams this winter caused some pretty major water damage, 
so we're having the walls and ceiling repaired this week.
Here are some "before" photos:


Wasn't it pretty?! 


And here it is now: 
It's such a mess!
I decided to move my sewing machine to our bedroom, and to just work on small projects this week, as there isn't much room to spread out.  So this week has been all about pillows!

I really love how this pillow finished up!
The paper-pieced pattern can be found here.
I added a scrappy border and hand quilted it with #8 perle cotton in cream and turquoise.
The back is a super soft turquoise minky with a zip closure, but I forgot to take a picture of it!

Wednesday, April 9, 2014

Works in Progress, 4.9.14

Finished this week:
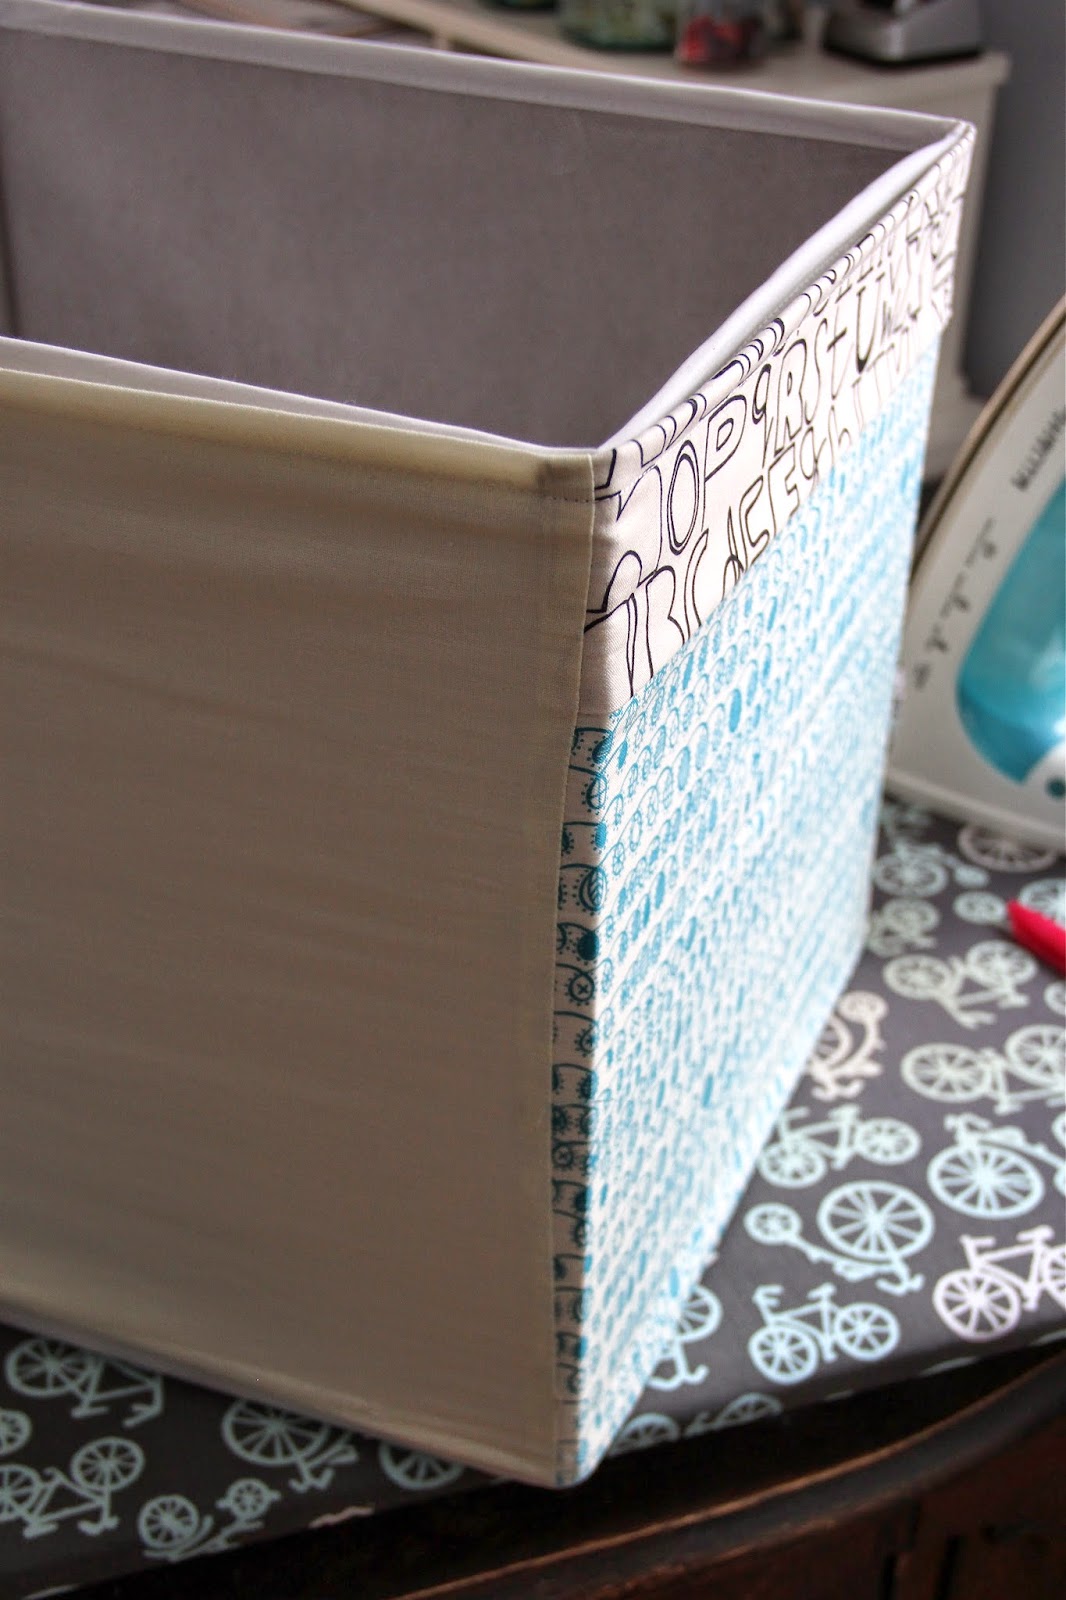
 Ikea Drona Storage bins -- covered in Summersville fabrics.
(Tutorial here.)
So happy to have our toy storage area all cleaned up and organized!

In Progress:
My creation for do.Good Stitches this month -- a scrappy sprouts block, inspired by Traceyjay's quilt.  I'm asking each member of the Peace circle to make blocks in the colors of the rainbow.  With any luck, I'll get this one finished up in time for the Minnesota State Fair -- there is a category for quilts made with more than 40 fabrics that I'd like to enter again!

My triangle quilt -- I have half of the rows done, and sewed lots of triangles into pairs last night.  Hoping to get this quilt top done soon!


Monday, April 7, 2014

Fabric Covered Ikea Storage Boxes

Before:
After:


Much, much better!
My goal with this project was to cover these Ikea Drona boxes with bright, fun fabrics, but still have the tab/handle at the top to make them easy to access for the kiddos.

Here's a quick tutorial:
Start with 3 pieces of fabric -- the main front piece (13.5 inches square), accent piece/handle (6 by 13.5 inches), and the solid piece that wraps around the sides and back of the box (42 x 13.5 inches). {I didn't want to use up all of my pretty fabric on the sides and back of the box -- this is why I used a large solid piece!}

 Fold the accent piece in half, wrong sides together, and sew it to the top of the main front piece, lining up the rough edges.

 Next add the solid piece -- sew the 13.5 inch ends to each side of the front/accent piece, right sides together.  Now you basically have a tube -- which is inside out at this point.

Fold over the raw edges and stitch them down, with a 1/2 inch seam allowance.  Do the top first, then measure it on your IKEA box -- you may need to do slightly more or less of a seam allowance on the bottom edge, depending on how accurate your top seam allowance was.  Since I was making so many of these boxes, I only turned over my seam once -- so it's not really "properly finished" on the inside -- but since no one is going to see it, I figured I wouldn't be too picky about this!
 Here is how the "finished" seams look -- good enough for a toy box cover!
Finished!
(fabrics are Summersville by Lu Summers)

Linking up to Fabric Tuesday at Quiltstory!

Tuesday, April 1, 2014

Triangle Quilt Along

There is nothing more fun than starting a new project--
especially when it's a quilt along and there are prizes each week!

This will be my first ever triangle quilt -- I've always admired them but never made one of my own.  Can't wait to start sewing the rows together!  

(linking up to the Triangle Quilt Along at sassyquilter.com)